> For the complete documentation index, see [llms.txt](https://sixbot.gitbook.io/sixbot-help-center/llms.txt). Markdown versions of documentation pages are available by appending `.md` to page URLs; this page is available as [Markdown](https://sixbot.gitbook.io/sixbot-help-center/tutorial/crm/createcustomer.md).

# Create Customer

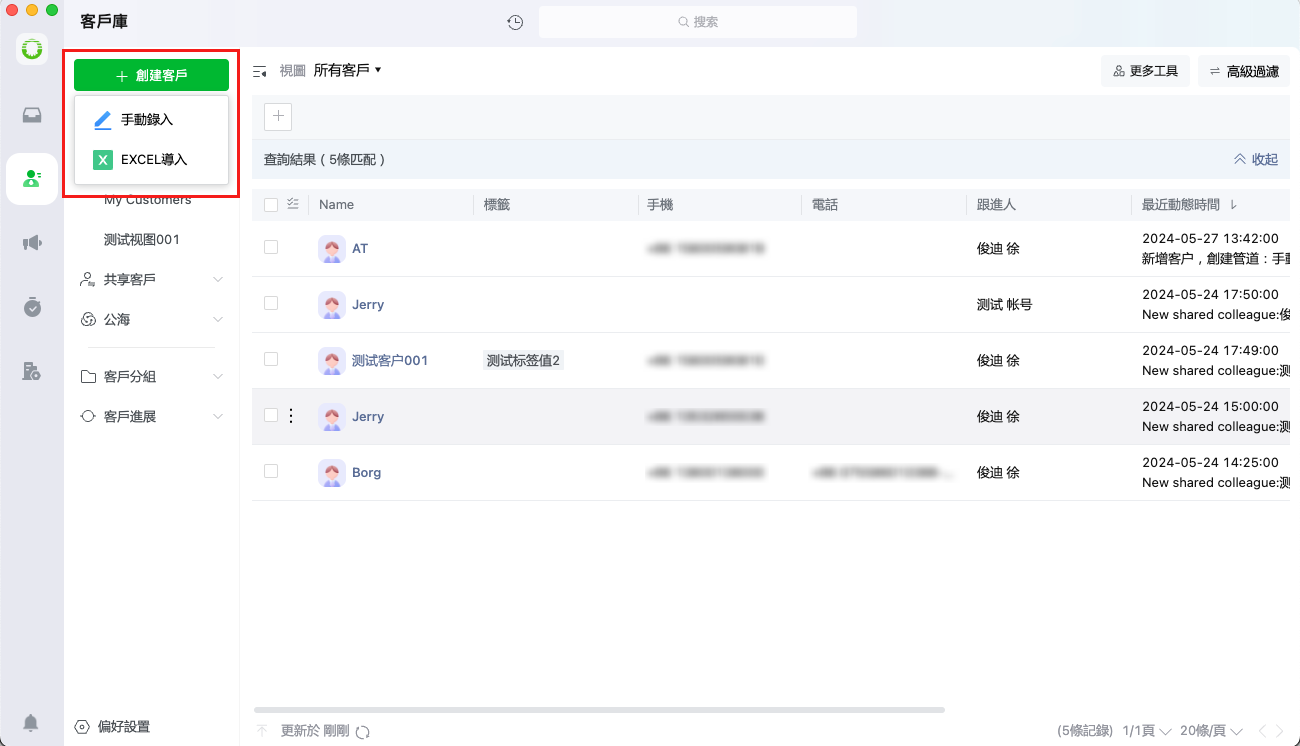
There are two ways to create customers:&#x20;

1. Manual entry&#x20;
2. Excel entry

<figure><img src="https://content.gitbook.com/content/AWW4pI0mYFdjRWTLLpNR/blobs/B5t5oYJ2dbU0BDsPTsS6/image.png" alt=""><figcaption></figcaption></figure>

## **Manual Entry**

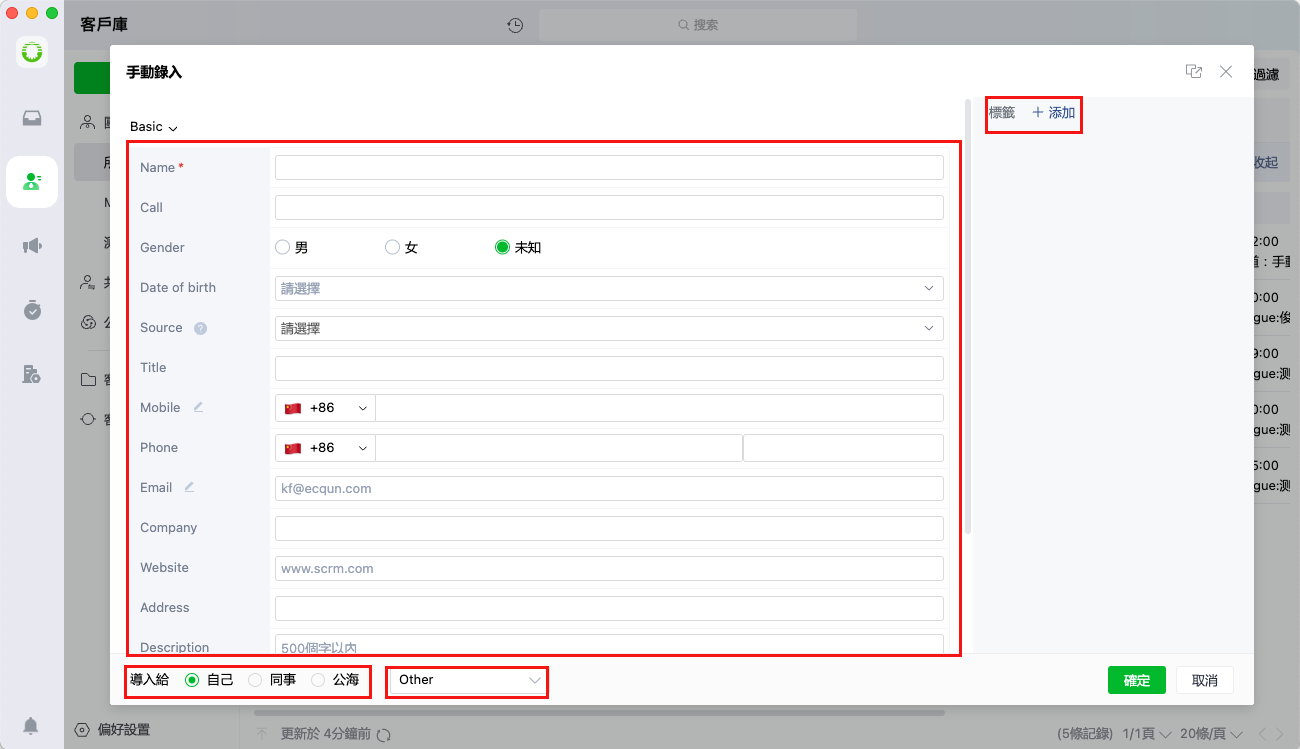
During manual customer entry, users may fill in relevant fields, add tags, select import objects, and choose customer groups for proper classification

<figure><img src="https://content.gitbook.com/content/AWW4pI0mYFdjRWTLLpNR/blobs/eIpHSVAs7VHo7WDL54KM/image.png" alt=""><figcaption></figcaption></figure>

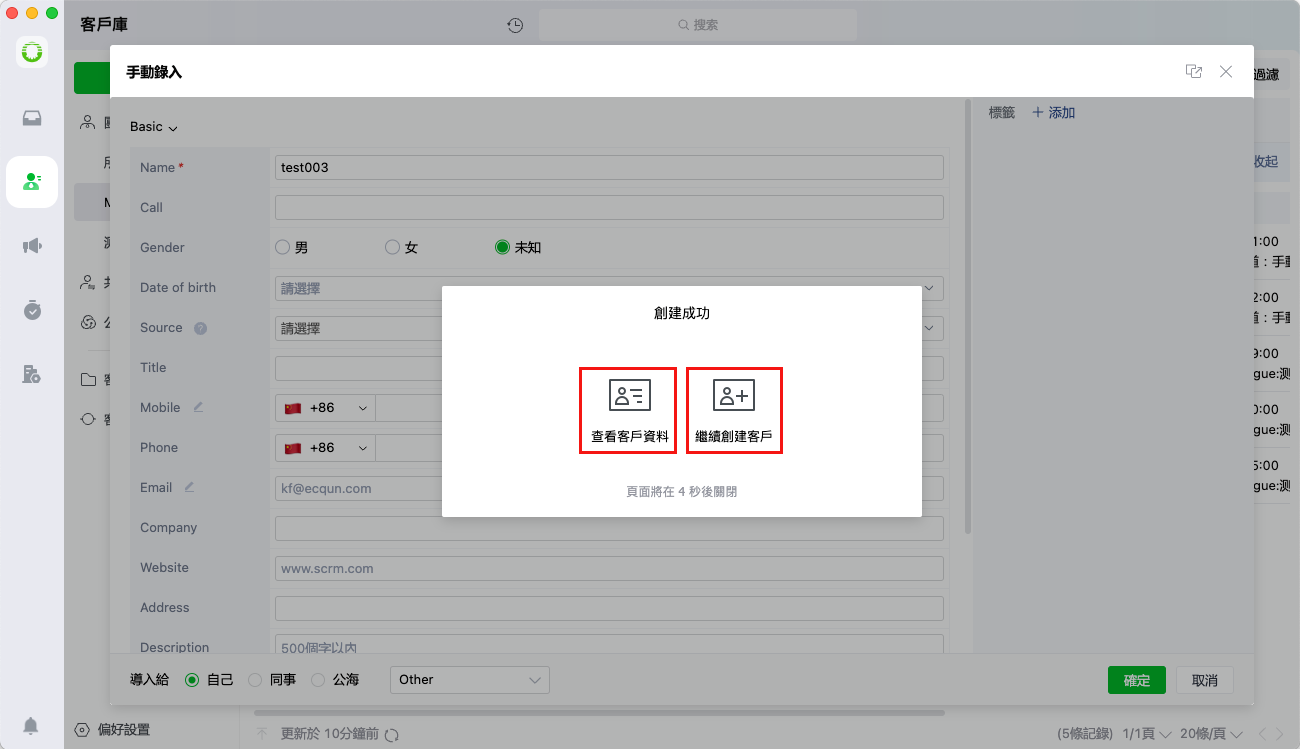
After the customer information is entered, the user can choose to view the customer profile or continue creating other customers

<figure><img src="https://content.gitbook.com/content/AWW4pI0mYFdjRWTLLpNR/blobs/Dt7jHobHNqmW7CGHZG85/image.png" alt=""><figcaption></figcaption></figure>

## **Excel Import**

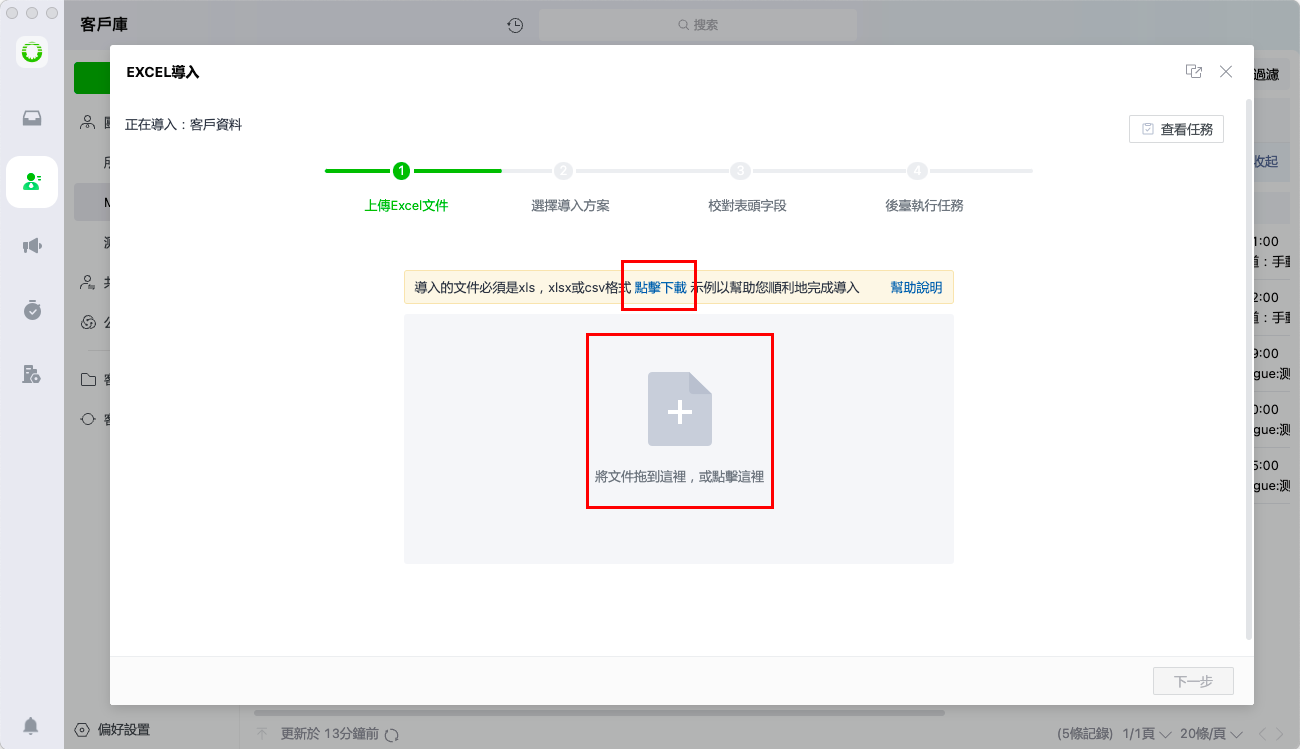
In addition to manual entry, users can alternatively import customer data via Excel. We provide a downloadable import template to help organize customer information before direct upload

<figure><img src="https://content.gitbook.com/content/AWW4pI0mYFdjRWTLLpNR/blobs/YVO6UryXaD5WeaxWg00l/image.png" alt=""><figcaption></figcaption></figure>

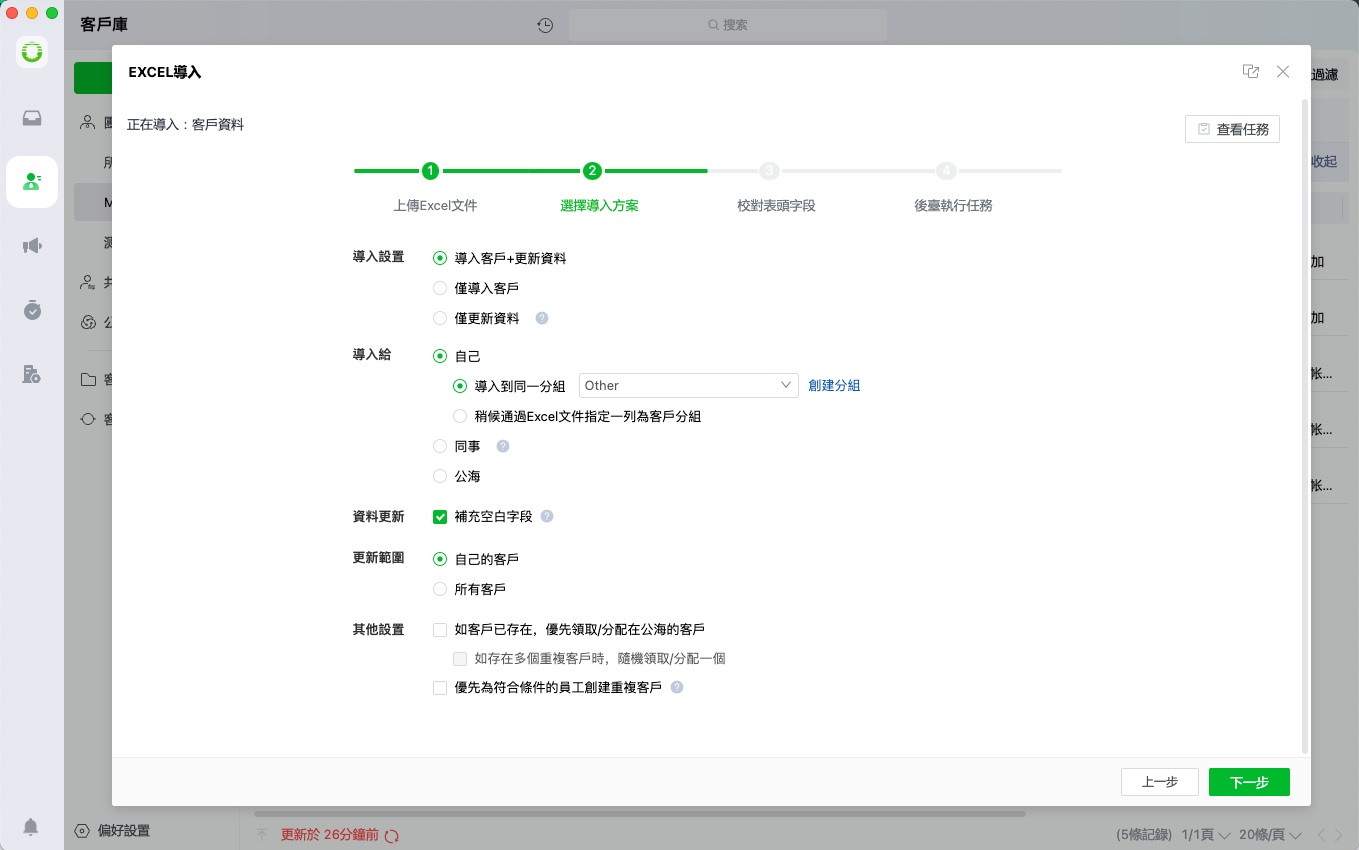
After uploading the file, users can customize the import configuration according to their specific needs

<figure><img src="https://content.gitbook.com/content/AWW4pI0mYFdjRWTLLpNR/blobs/9v1wIIq4OmyEhB0EY91c/image.png" alt=""><figcaption></figcaption></figure>

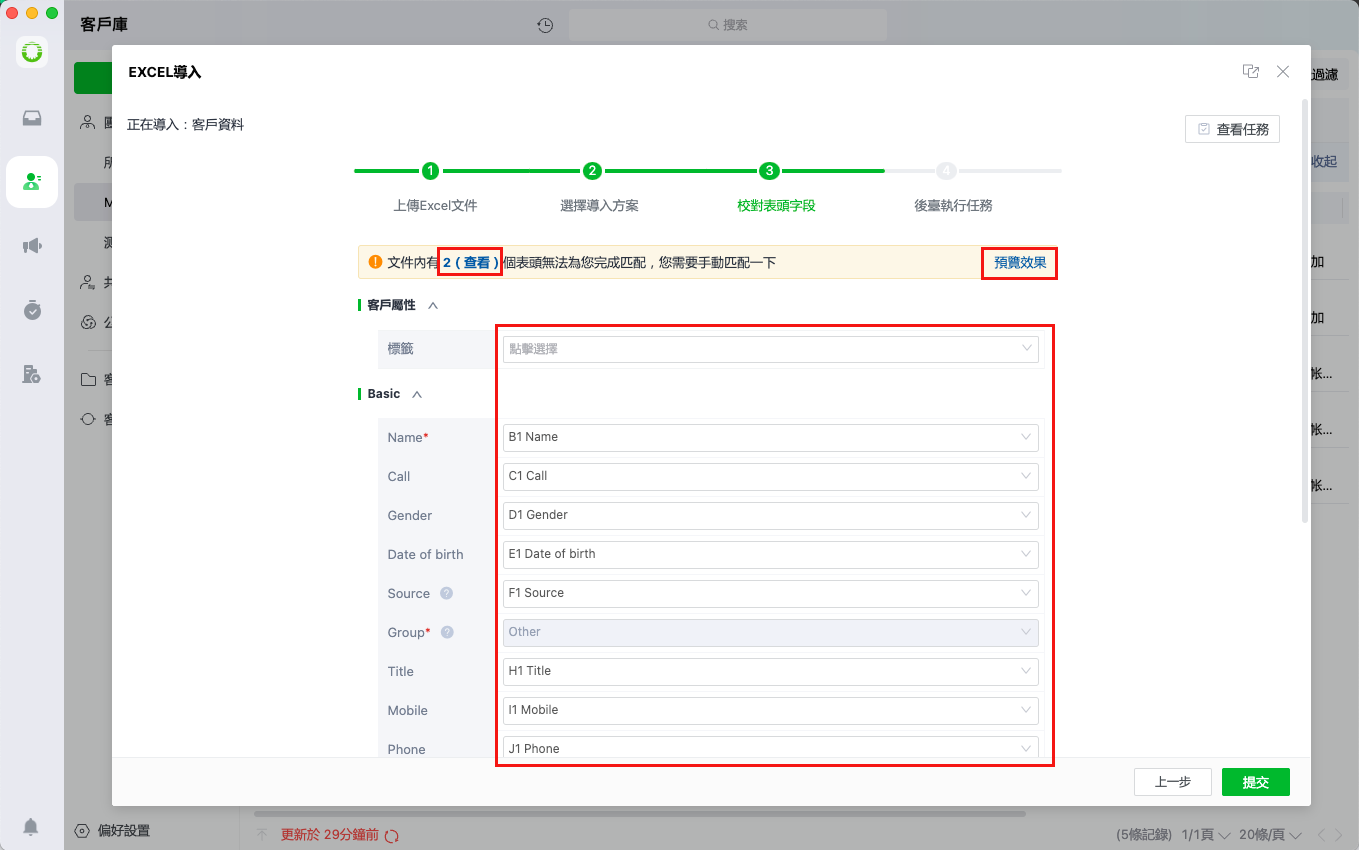
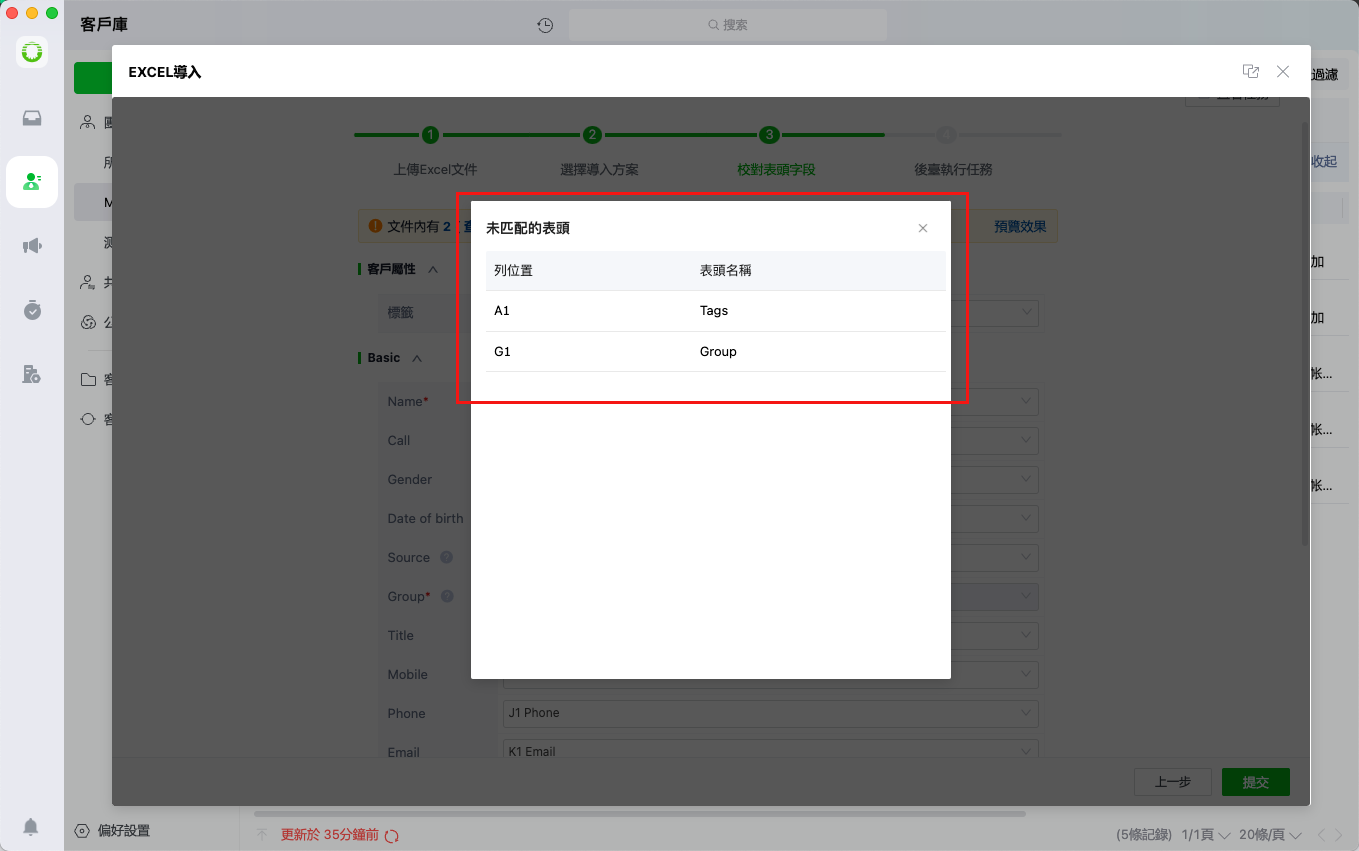
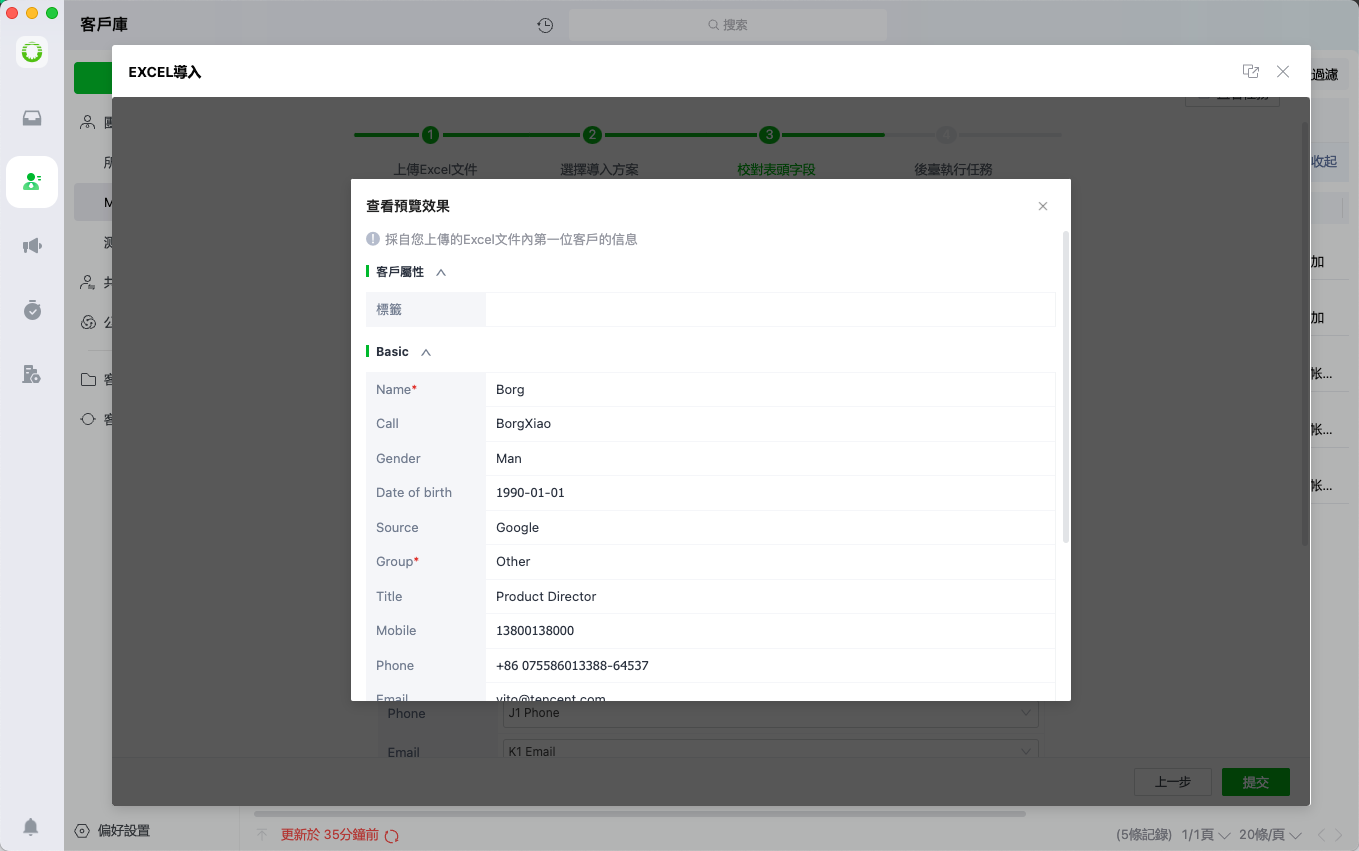
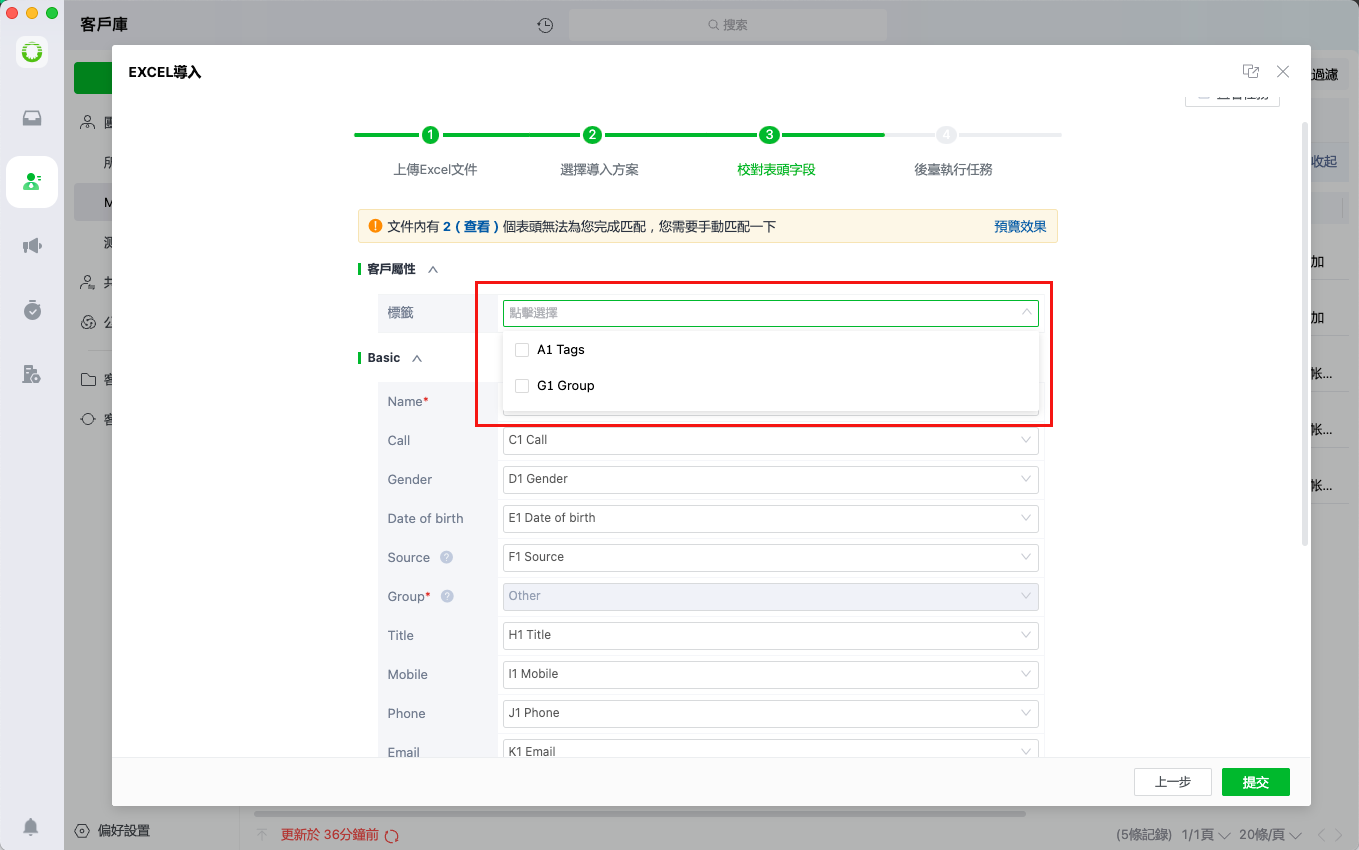
After completing the import setup, the system will display any fields that failed to automatically match along with a preview of the field mapping results, enabling users to manually adjust the field mappings directly within the interface

<figure><img src="https://content.gitbook.com/content/AWW4pI0mYFdjRWTLLpNR/blobs/Di1DVjkj9PuXbuSKfDC4/image.png" alt=""><figcaption></figcaption></figure>

<figure><img src="https://content.gitbook.com/content/AWW4pI0mYFdjRWTLLpNR/blobs/q11U5g615bu9UJKl2y6p/image.png" alt=""><figcaption></figcaption></figure>

<figure><img src="https://content.gitbook.com/content/AWW4pI0mYFdjRWTLLpNR/blobs/WqiGbUy6A2gYNzn6O1Lo/image.png" alt=""><figcaption></figcaption></figure>

<figure><img src="https://content.gitbook.com/content/AWW4pI0mYFdjRWTLLpNR/blobs/Ku3oVWlRKu5KTrQotoMF/image.png" alt=""><figcaption></figcaption></figure>

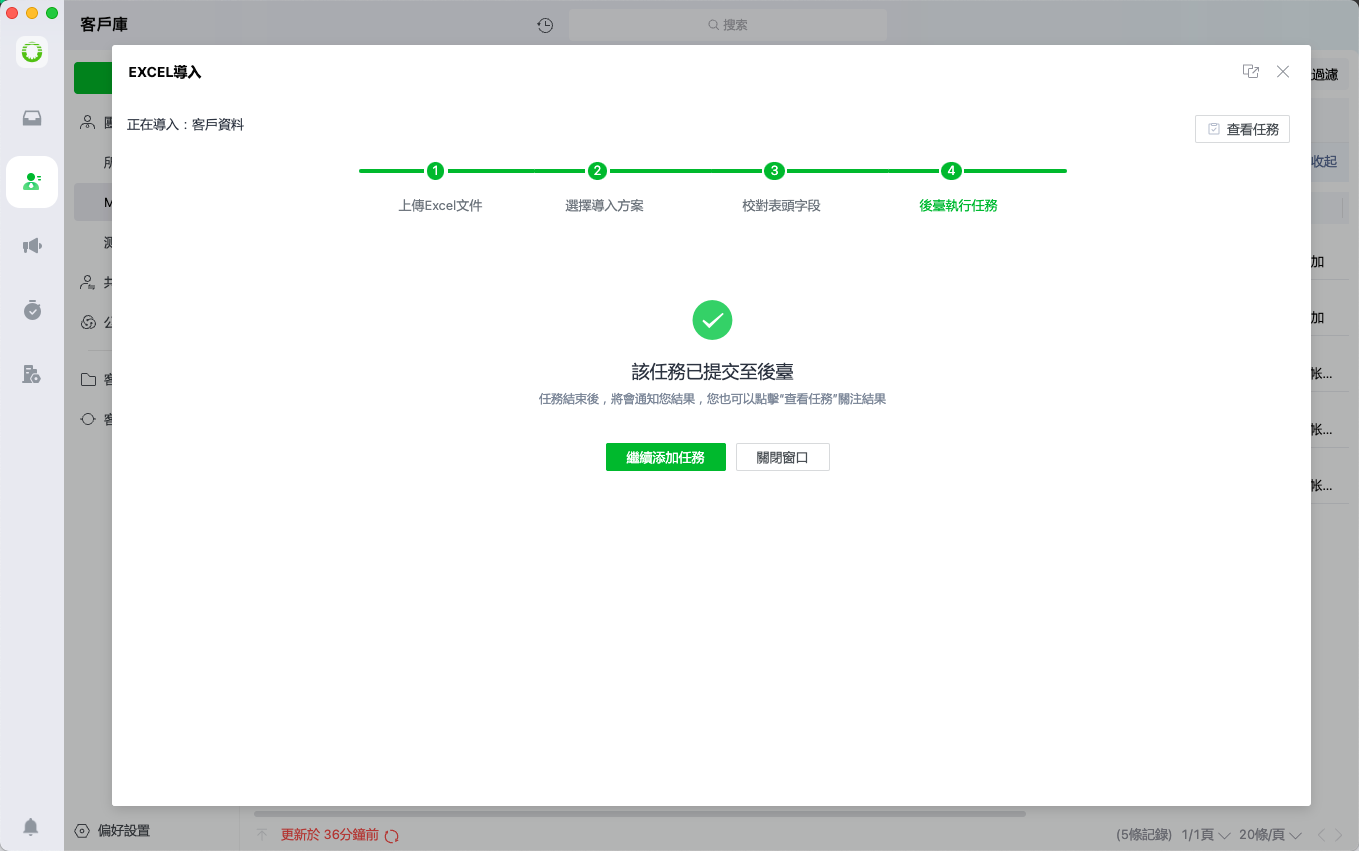
After completing the field matching, the import task will continue to run in the background automatically, and users can monitor the progress through the "View Task"
<figure><img src="https://content.gitbook.com/content/AWW4pI0mYFdjRWTLLpNR/blobs/Vjy7esH3x5xd15oRr3Qw/image.png" alt=""><figcaption></figcaption></figure>